Applications
Heat Transfer Vinyl (HTV) is a versatile and popular material used in various customization projects. Its ability to adhere to fabric and other surfaces through heat makes it an excellent choice for creating personalized items. Here are some of the most popular uses of HTV:
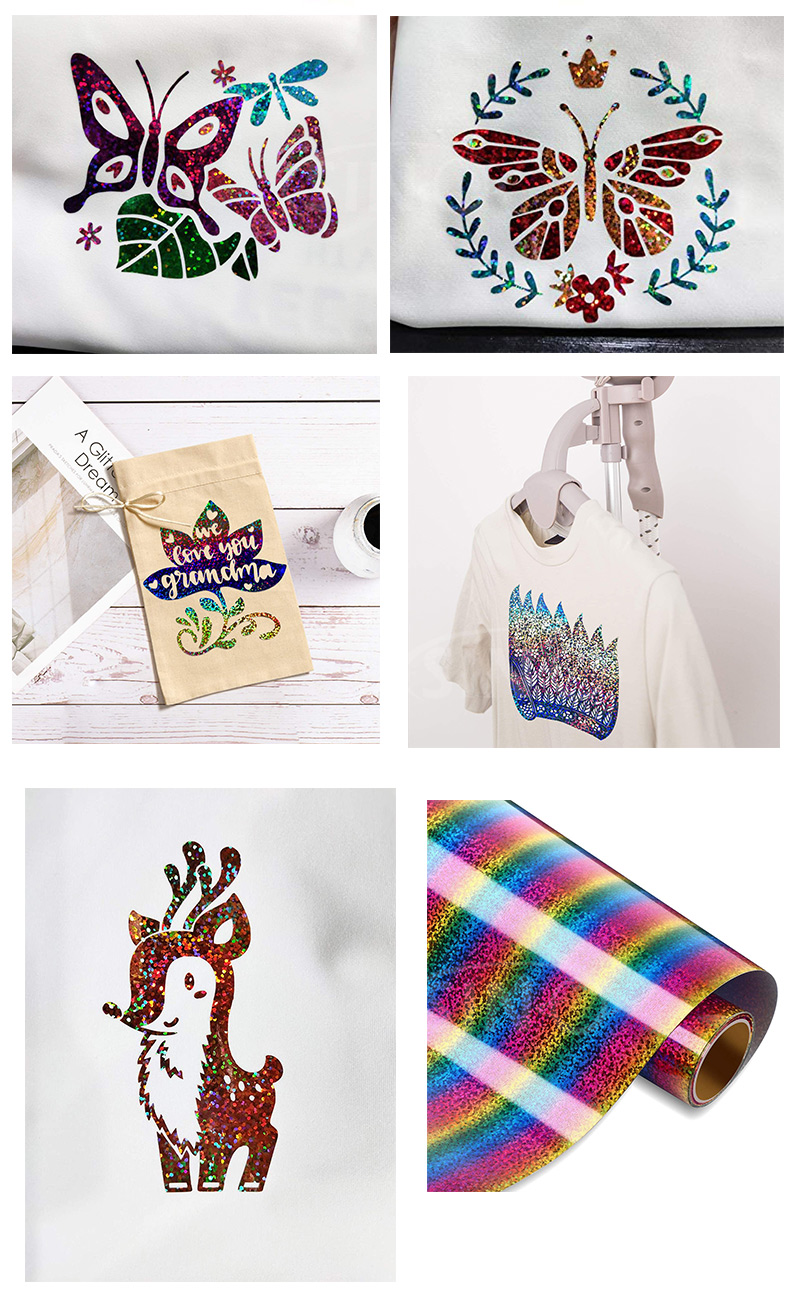
1. Customizing T-Shirts
- Overview: One of the most common applications of HTV is customizing t-shirts. Whether for personal use, promotional items, or retail products, HTV allows for unique and creative designs.
- Uses: Logos, slogans, graphic designs, and personalized names.
- Popularity: Perfect for sports teams, family reunions, corporate events, and fashion brands.
2. Decorating Bags
- Overview: HTV can be used to add designs to various types of bags, including tote bags, backpacks, and duffel bags.
- Uses: Brand logos, artistic patterns, monograms, and promotional messages.
- Popularity: Common for giveaways, branded merchandise, and personalized gifts.
3. Personalizing Hats
- Overview: Customizing hats with HTV is another popular application. It allows for adding text, logos, and other designs to caps and beanies.
- Uses: Team logos, event branding, fashion statements, and custom graphics.
- Popularity: Widely used in sports, fashion, and promotional merchandise.
4. Creating Custom Apparel
- Overview: Beyond t-shirts, HTV is also used on a variety of apparel items like hoodies, jackets, and uniforms.
- Uses: Team uniforms, personalized gifts, and branded clothing.
- Popularity: Ideal for schools, sports teams, corporate apparel, and fashion lines.
5. Crafting Home Decor
- Overview: HTV isn’t limited to clothing and accessories; it can also be used for home decor projects.
- Uses: Custom pillowcases, wall art, and decorative textiles.
- Popularity: Popular among DIY enthusiasts and for creating personalized home gifts.
6. Customizing Shoes
- Overview: HTV can be applied to shoes, offering a unique way to personalize footwear.
- Uses: Names, designs, team logos, and creative patterns.
- Popularity: Common for sports teams, fashion customization, and unique gift ideas.
7. Making Promotional Items
- Overview: Businesses use HTV to create branded promotional items.
- Uses: Custom logos on t-shirts, bags, and hats for marketing campaigns.
- Popularity: Effective for increasing brand visibility and creating memorable promotional materials.
Tools Needed
- Vinyl cutter
- Heat press
- Weeding tools
- Cutting mat
- Teflon sheet or parchment paper
- Heat transfer tape
- Measuring tools (ruler, tape measure)
- Pressing pillows or pads
- Lint roller
- Computer and design software
Basic Process
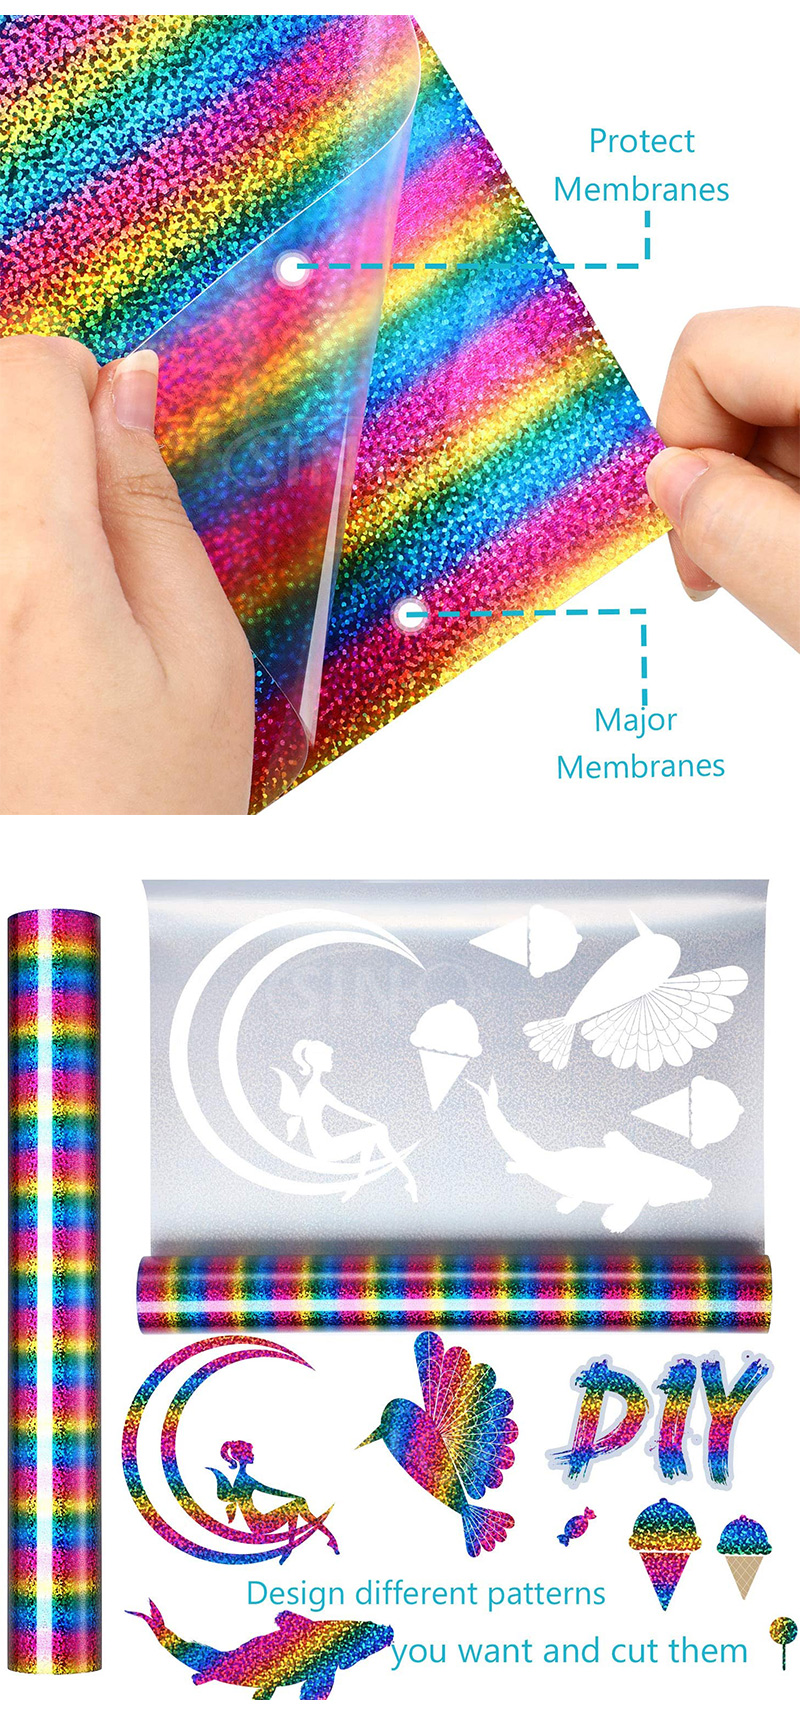
- Create Your Design
- Use design software to create or select your design.
- Mirror the design (flip horizontally) before cutting.
- Cut the HTV
- Load the HTV onto the cutting mat with the shiny side down.
- Insert the mat into the vinyl cutter and cut the design.
- Weed the Excess Vinyl
- Use weeding tools to remove the excess vinyl, leaving only the desired design on the carrier sheet.
- Prepare the Fabric
- Preheat the fabric for a few seconds using the heat press to remove moisture and wrinkles.
- Use a lint roller to clean the surface of the fabric.
- Position the Design
- Place the weeded design on the fabric with the carrier sheet facing up.
- Use measuring tools to ensure the design is correctly positioned.
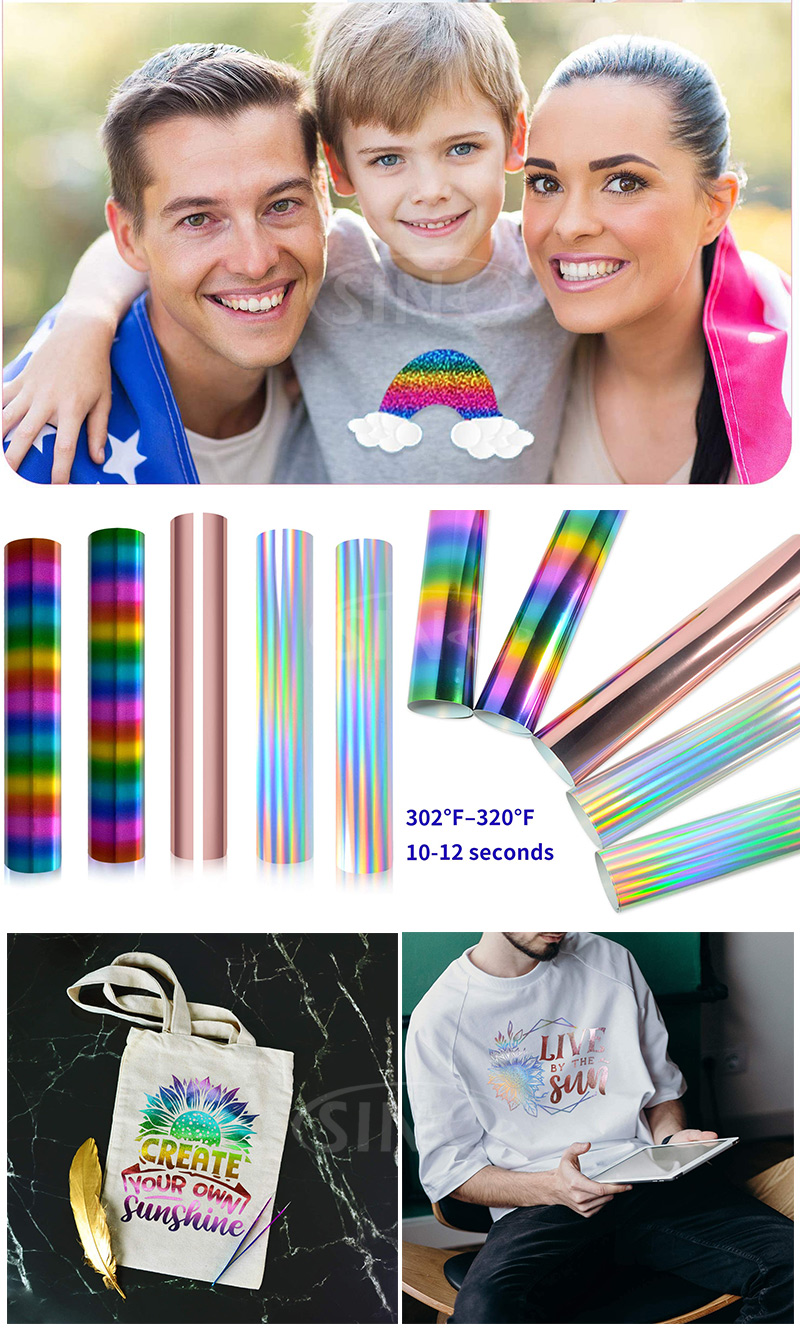
- Apply Heat and Pressure
- Cover the design with a Teflon sheet or parchment paper.
- Press the design with the heat press at the recommended temperature and time (usually around 305°F/150°C for 10-15 seconds).
- Apply firm pressure during pressing.
- Remove the Carrier Sheet
- Carefully peel off the carrier sheet while the design is still warm (warm peel) or after it has cooled down (cold peel), depending on the HTV type.
- Final Press (Optional)
- For some HTVs, a final press may be needed to ensure proper adhesion.
- Cover the design with the Teflon sheet again and press for a few more seconds.
- Inspect the Design
- Check for any areas that may need additional pressing.
- Make sure the design is fully adhered to the fabric.